


Add some paper to the bottom of your trash bag to keep liquids from leaking out
February 02, 2024
1 min

When it comes to DIY home improvement projects, caulk is often a go-to solution for sealing gaps and cracks around your house. Whether you’re caulking your windows, bathroom fixtures, or any other area that requires watertight sealing, there’s a simple yet effective trick that can make your caulking job look even more professional and clean. By lining the edges of a caulked area with painter’s tape, you can achieve precise lines and avoid any messy-looking mishaps.
Painter’s tape, also known as masking tape, is a type of pressure-sensitive tape that is easy to apply and remove without leaving any residue or damage on the surface it’s been attached to. It was initially created for painters to protect areas they didn’t want to be painted, such as trim, baseboards, and windowsills. However, this versatile tool has found its way into various home improvement projects like caulking.
Why should you consider using painter’s tape when caulking? Well, for starters, it helps you achieve clean, straight lines with minimal effort. Professionals often rely on painter’s tape to create sharp edges between different surfaces or colors, and you can utilize the same technique for your caulking projects.
When you’re ready to caulk an area, begin by cleaning the surface thoroughly. Remove any dirt, dust, or old caulk to ensure the adhesive sticks properly. Then, measure and cut enough painter’s tape to cover the edges surrounding your caulked area. Make sure to press the tape firmly onto the surface, paying extra attention to the edges you want to protect from caulk.
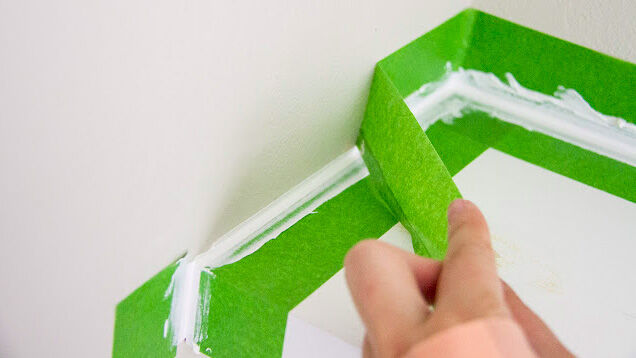
Next, apply the caulk using a caulking gun or your preferred method. Be careful to fill the gaps evenly without applying too much pressure. Once the caulk is in place, use a caulk smoothing tool or your finger to create a smooth, seamless finish. Afterward, remove the painter’s tape immediately but carefully. Peel it away at a 45-degree angle to prevent any caulk from lifting along with the tape.
The genius behind using painter’s tape is the clean border it creates, preventing any excess caulk from smudging or seeping into unwanted areas. It gives you the freedom to focus on applying the caulk perfectly, knowing that the tape will catch any potential mistakes. It’s a small but significant detour that ultimately saves you time and guarantees a professional-looking outcome.
In addition to its visual benefits, using painter’s tape also simplifies the cleanup process. With clean edges and a tidy application, there will be less excess caulk to remove or touch up once the project is complete. This not only saves you time but also ensures a neater overall appearance.
So, the next time you’re tackling a caulking project, don’t forget to include painter’s tape in your toolkit. It’s a cost-effective and straightforward solution that can elevate the quality of your work. Enjoy clean lines, a hassle-free process, and professional results by taking this simple yet effective home hack into consideration.
Source: bestlifeonline.com
Quick Links
Legal Stuff